

Perplexity, by Otto Berkeley
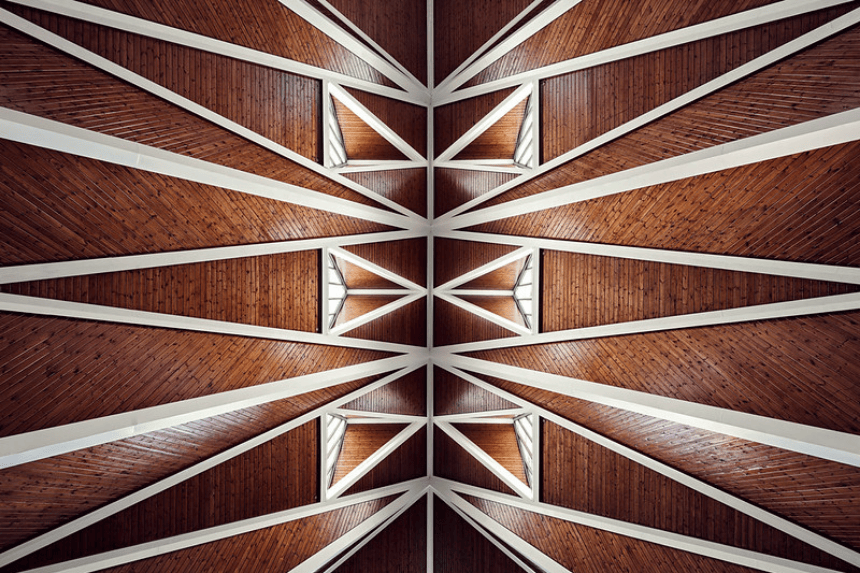
Hidden away at Lorrimore Square in South London is St Paul’s Church, which I came across during September’s Open House weekend. The church is a small but remarkable Grade II-listed building built in the late 1950s after the original church burned down during the second world war. Replacing the original 19th-century Victorian Gothic style is an innovative post-war design by John Wimbleton of architect practice Woodroffe, Buchanan & Coulter, built from a mixture of brick, copper and rubble stone from the old church.
I was drawn to the elegance of the triangular motif around the church and the way it represents the importance of the Trinity in Eucharistic worship, but there was also something remarkable about the balance the architecture struck inside the building: an abstract and almost minimalist quality to its structure, and at the same time an atmosphere within the church – situated on the first floor above a day centre – that was warm, welcoming and full of character. The Open House staff volunteering at the church were incredibly gracious about allowing me to photograph the interior from every angle, but I kept coming back to this look-up of the church’s beautifully geometric roof, which seemed to convey the airy simplicity of the building’s structure as well as its progressive design.
The image was straightforward to shoot – with the camera resting on the ground, the settings dialled in and the exposures triggered using a shutter remote – and equally straightforward to edit. Seven exposures were blended in Photoshop using luminosity masking, balancing darker exposures for the light streaming through the windows and brighter exposures to bring out the rich detail within the roof’s steep timber. Once the exposures were blended, I used the Pen Tool to create a selection of the concrete frame, desaturating its warmer tones and then using my brighter exposures at a low opacity with the blend modes set to Soft Light and Screen. This helped to reinforce the bold framework within the image and created a nice contrast against the darker and more detailed texture in the timber.
Colour-grading the image was a mixture of Curves and Levels adjustments, with Colour Balance and Selective Colour adjustments to find the right combination of yellow, red and magenta. It was important to me to bring out the warm tones within the roof, but I was also wary of the image becoming an overload of red and orange, and used a Gradient Map to add a hint of dark blue in the shadows to offset this. The final result was a quick and easy image to capture and edit, but it was also one of the most rewarding to visit, with the aspiration and thoughtfulness of the building’s design leaving a lasting impression.
You can also connect with me on Facebook, 500px, Google+ and Instagram.
Interesting how similar it looks to Perplexity AI’s logo
They probably had the AI design it’s own logo after looking at the photographers work 😀